In this blog post, I will tell you everything you need to know about comparing files in Visual Studio Code. Starting with the various ways to select files for a comparison, followed by an explanation of the VS Code diff viewer that displays the differences. Finally, I will give you some tips on how to fine-tune or improve the displayed diff.
Open The Diff Viewer
Let’s start with the different ways to initiate a file comparison in VS Code. On a desktop, you can use the table of contents on the left to quickly jump between them.
Compare Two Files in Your Workspace
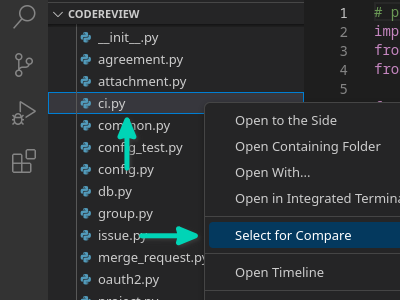
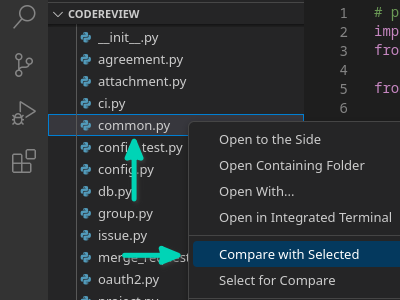
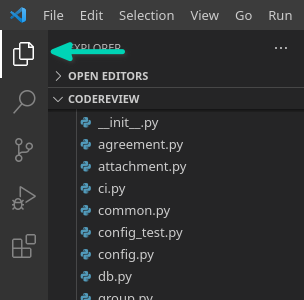
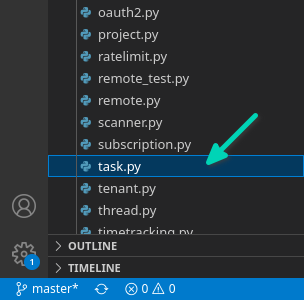
To compare the content of two files in your workspace, follow these steps:

The diff is hard to understand? Check out programming language aware diffs.
Tip: You can open the diff viewer directly from the command line. Just execute the following command (replace the paths with the two files you want to compare):
# If you use VS Code:
code --diff path/to/first_file path/to/second_file

# If you use Codium:
codium --diff path/to/first_file path/to/second_file
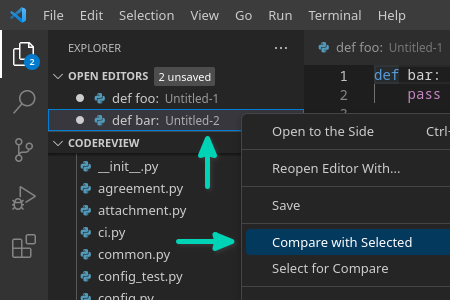
Compare Unsaved Files/Editors
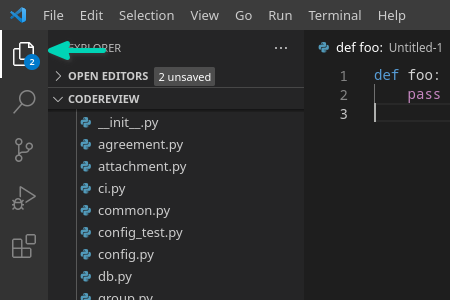
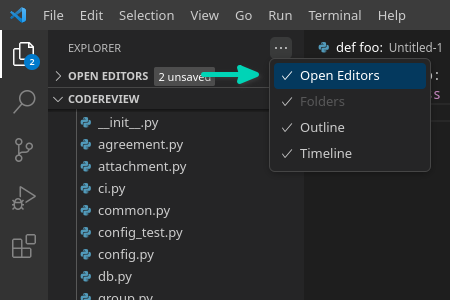
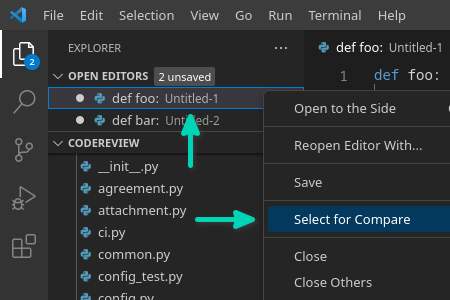
The last described method works only for files saved to your disk. If you want to compare the content of two editor windows without saving them first, follow these steps:
The diff is hard to understand? Check out programming language aware diffs.
Compare Different Git Versions of a File
If your workspace is part of a Git repository, you can view how commits have affected the content of Git tracked files. To view the changes, make sure that Git is installed on your system (download) and follow these steps:
The diff is hard to understand? Check out programming language aware diffs.
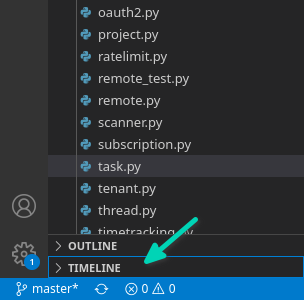
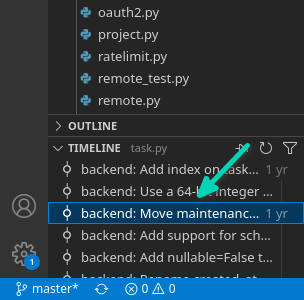
Tip: You can not only view the changes introduced by a single commit, but also compare arbitrary git versions of a file. To do so, follow the steps from the first method and simply select entries from the timeline view instead of the workspace directory.
Compare The Content of Two Folders
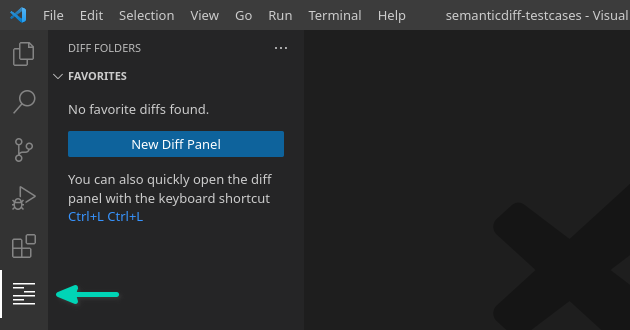
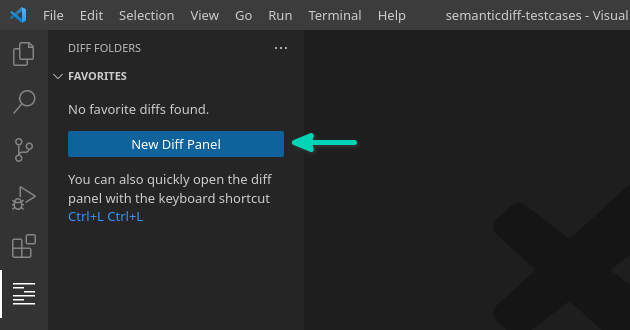
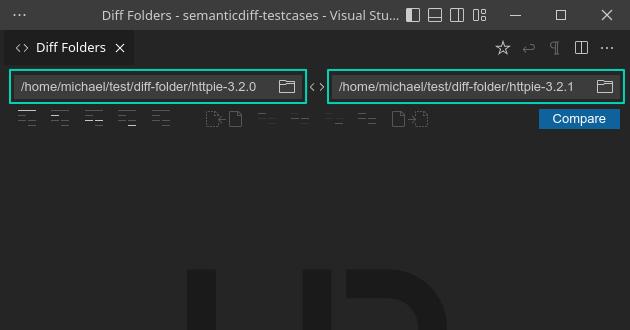
To compare the content of two folders without manually diffing every single file, install the Diff Folders extension and follow these steps:
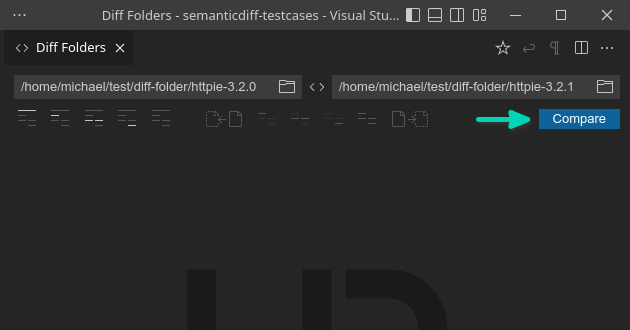
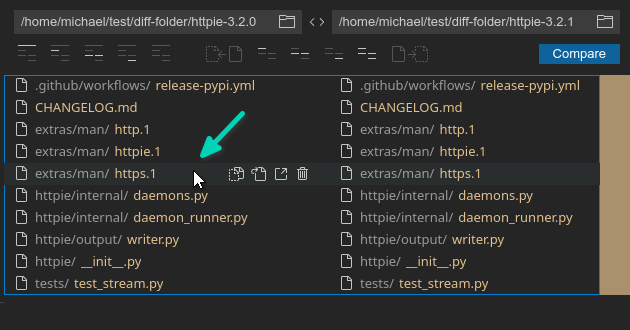
The Diff Folders extension offers several other features, such as copying files between the two folders. Check out the marketplace page to learn more about them.
Diff Viewer Explanation
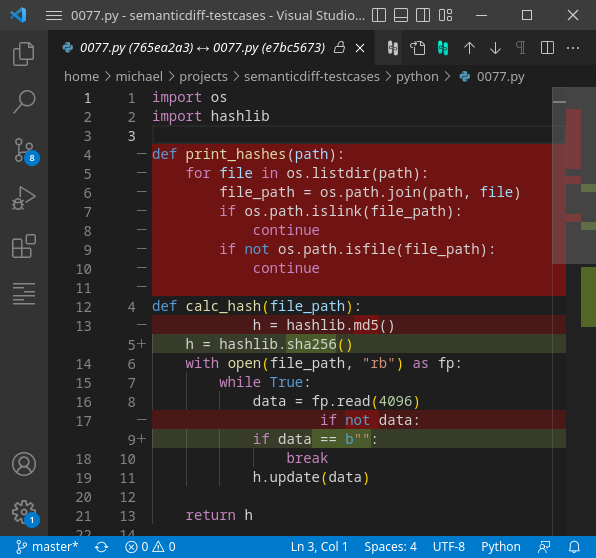
After following any of the methods described above, the diff viewer should open. It should look similar to this:
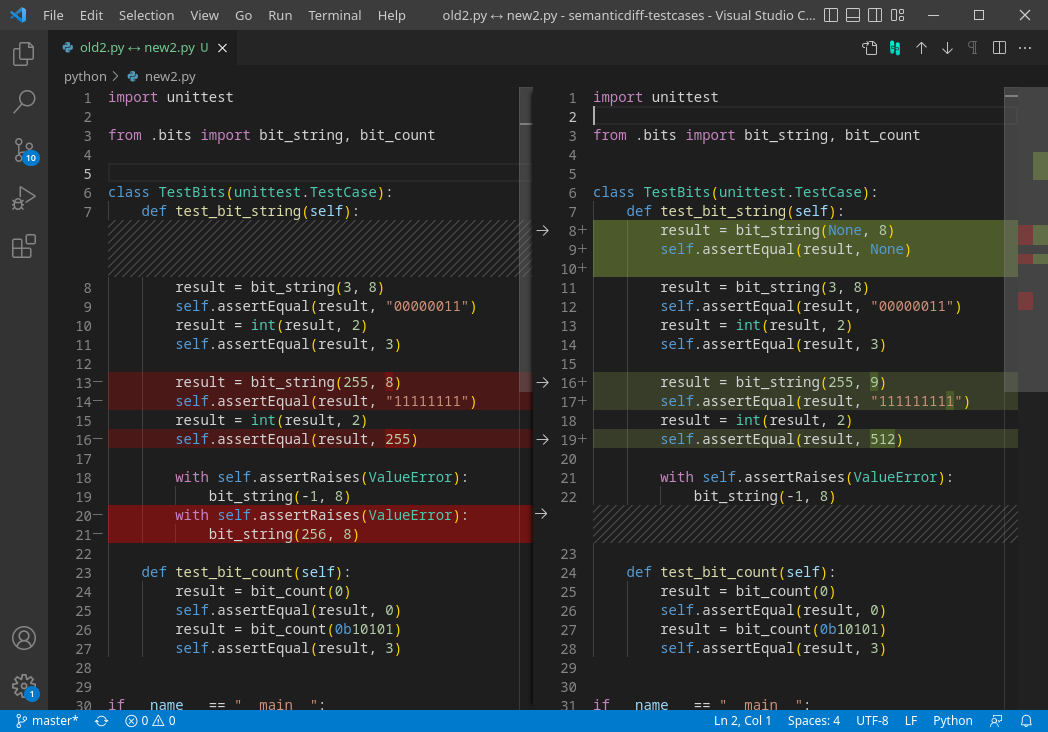
On the left side you can see the content of the old file, which is either the first file you selected or the older git revision of the file. The right side shows the new file, which is the second file you selected or the new git revision. The differences between the two files are usually highlighted using the colors red and green, but the colors may vary depending on theme you are using.
Removed Lines
Lines that exist only in the old version are displayed using a bright red background on the left side and a diagonal pattern on the right side:

Added Lines
Lines that exist only in the new version are displayed using a diagonal pattern on the left side and bright green background on the right side:

Changed Lines
Lines that exist in both versions but contain differences use a light red and green background. Only the parts of the line that actually differ have an intense color:

This should give you basic understanding of how diffs work in Visual Studio Code. Below I have collected some tips on how you can further configure and optimize the diff viewer to your needs.
Tips & Tricks
The Visual Studio Code diff viewer provides a good out-of-the-box experience for many programming languages and other text-based file formats. In some cases, however, you can get better results by installing third-party extensions or by fine-tuning some settings. Here are some tips how you can get better diffs.
Programming Language Aware Diff
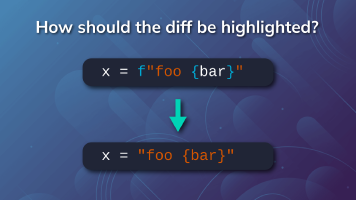
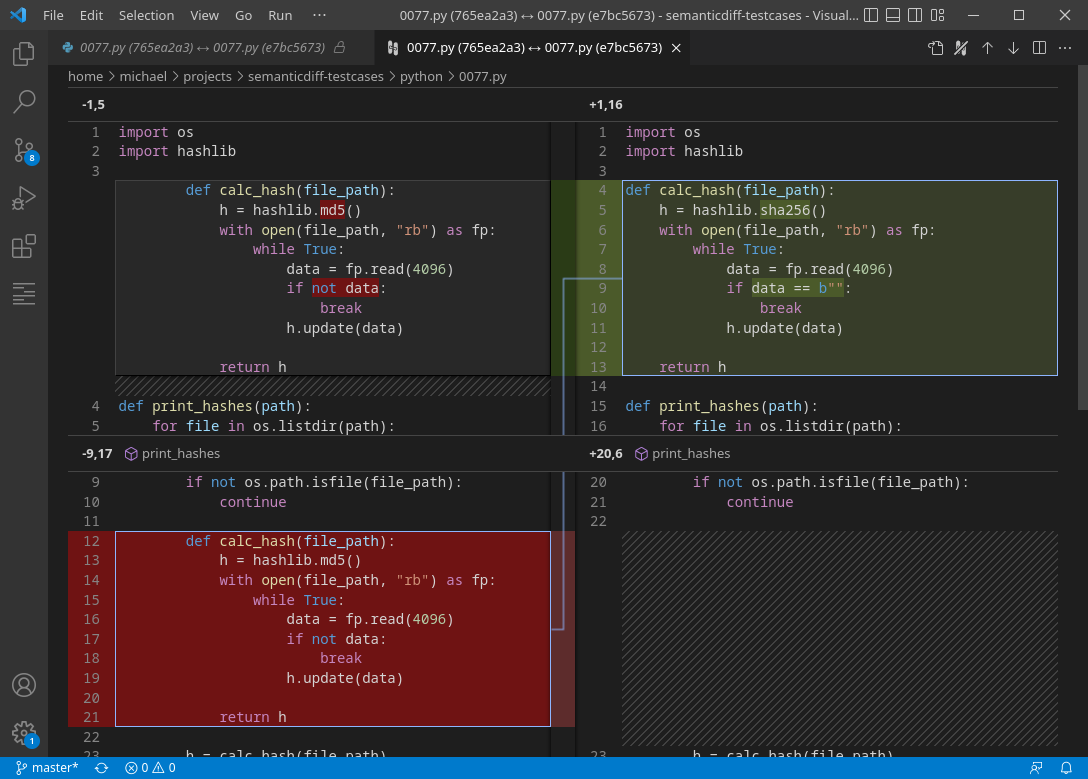
The diff viewer built into Visual Studio Code compares files line-by-line and highlights every character that has changed. This can lead to noisy diffs as many programming languages allow you to add optional semicolons or line breaks that show up as changes without having any effect on your program.
To solve this, we have developed a VS Code extension that generates smarter diffs. SemanticDiff parses the code of the files and compares their compiler representation instead of their text. This makes it possible to hide irrelevant changes and to detect moved code:
To give it a try, install SemanticDiff from the marketplace. After opening any diff (see Open The Diff Viewer) you should find the following icon in the upper right corner. Click it to switch to the smart diff mode:
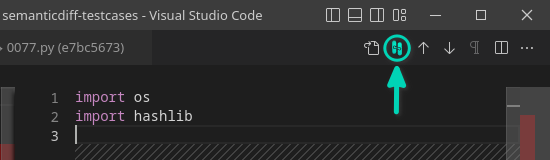
Please note that not all programming languages are supported yet. You may want to check the marketplace page first to see if your languages are included.
Inline/Unified Diffs
The default diff mode in Visual Studio Code displays the old and new code side-by-side. If your code has very long lines or you don’t have a lot of horizontal screen space, you might want to switch to the inline diff mode (called unified diff outside of VS Code).
The inline diff shows the old and new version of the code within the same document. This is achieved by first showing all the lines that have been deleted at the current position, followed by all the lines that have been inserted. It may take some time to get used to it, but it significantly reduces the amount of screen space required:
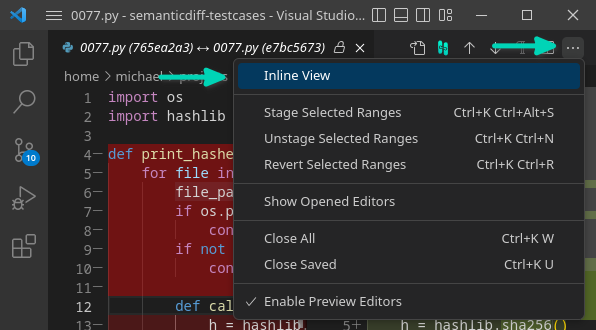
To switch between the side-by-side and inline diff mode, simply open the action menu and select Inline View:
Showing Leading/Trailing Whitespace Changes
By default VS Code ignores added or removed whitespaces at the beginning or end of a line. They don’t have a meaning in most programming languages and would only add visual noise to the diff. There are a few notable exceptions though. For example, Python uses the indentation of lines to determine which control flow structure the current line belongs to, and Markdown uses two trailing whitespaces to indicate a line break.
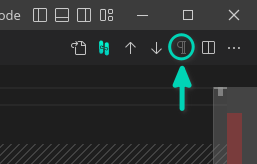
To toggle whether Visual Studio Code should ignore leading/trailing whitespace click this icon:
For more sophisticated whitespace handling, check out the Programming Language Aware Diff section.
Got Any Other Tips?
I hope you enjoyed this article and that it helps you with your next code review! Do you know any other great tips regarding diffs or the general use of VS Code? Let me know in the comments below!